


From designing to prototyping, Figma is the ideal collaboration tool for designers and developers. When using the platform, staying organized to ensure an efficient workflow is a challenge many designers encounter.
Fortunately, Figma has an impressive feature for keeping a structured project: Sections. Beyond organizing and grouping elements within a canvas, you'll be able to use the feature for your Figma prototypes.
Let's dive in and explore more about Figma Sections in this article.
What are Sections in Figma?
Figma Sections allow you to structure and group content on your canvas for ideation and prototyping to guide collaborators within your file.
Using Sections to divide parts of your design, especially for large projects, makes it easier to navigate. There are also useful collaborative functionalities:
- Marking Sections as "Ready for development" to help with developer handover
- Sharing specific sections to focus on smaller tasks within the project
Another great aspect of Sections is its ability to supplement the flow of Figma prototypes. Sections organize your design pages and structure the connection across prototypes.
When presenting your final output with Sections, Figma remembers the user's last viewed frame. This ensures that when the user returns, it will show the previously viewed frame first. This creates a more comprehensible transition of your prototype.
How to create Figma Sections
There are three ways to create a Section in Figma: Toolbar, Shortcut, and Selection.
Toolbar
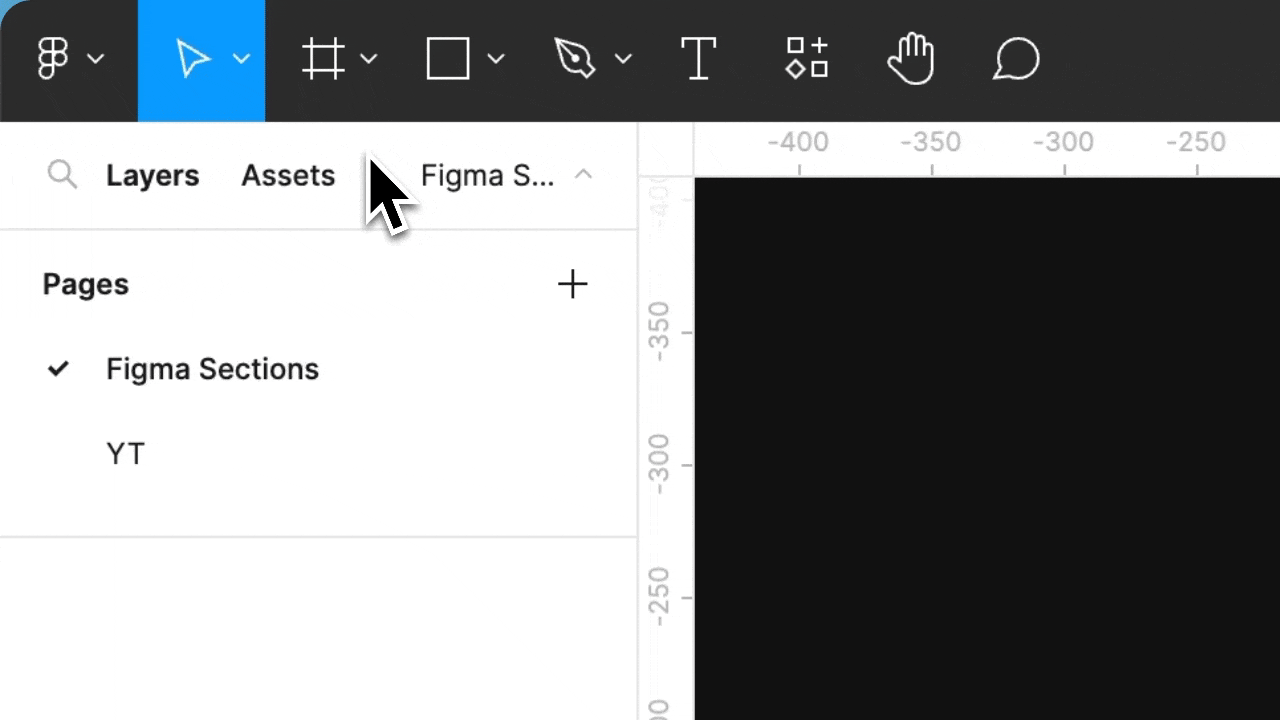
- Select the dropdown button next to the frame icon on the Toolbar
- Locate and select Section
- Create your Section by clicking and dragging over your desired space in the canvas
Shortcut
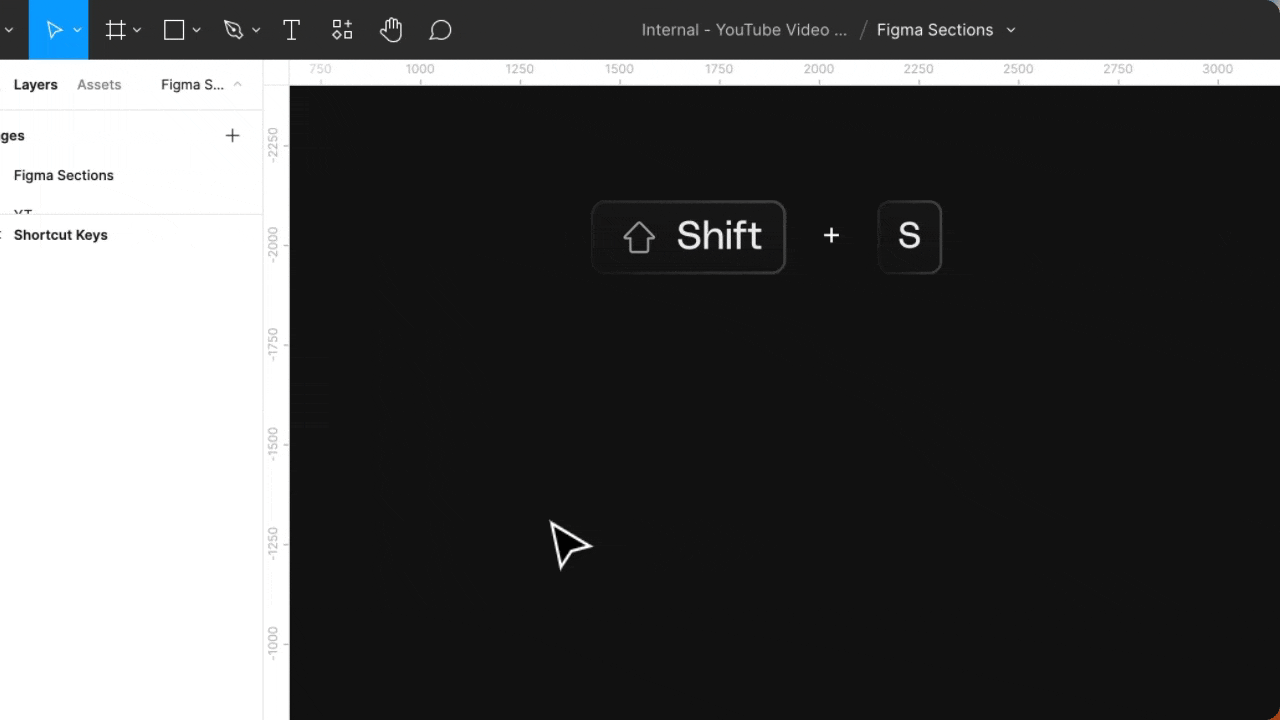
- Press the keyboard shortcut Shift + S to bring up the Section cursor.
- Create your Section by clicking and dragging over your desired space in the canvas
Selection
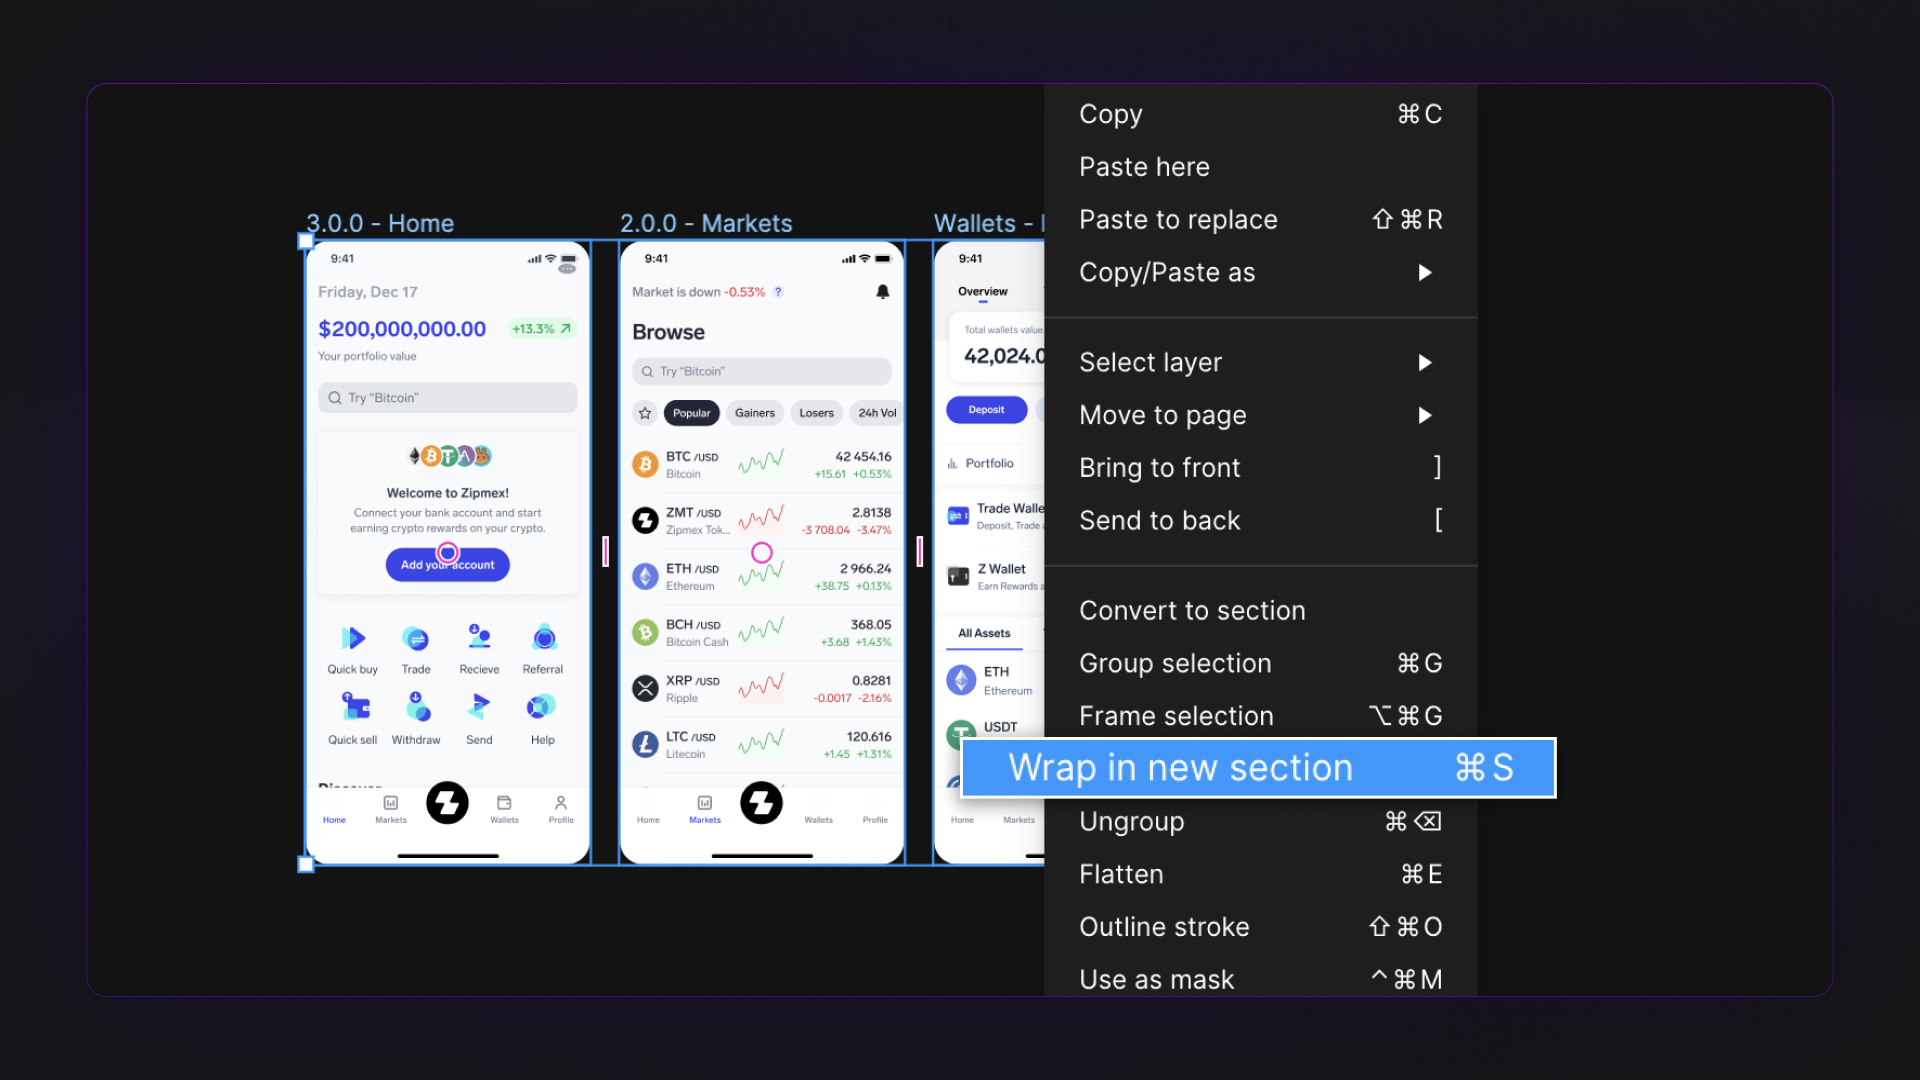
- Click and drag over your desired space in the canvas within your Figma canvas.
- Right-click the selected area and click Wrap in New Section
How to use Figma Sections
A completed project contains multiple frames, groups, and elements. This can appear cluttered, making it difficult for developers to look through your design.
Figma Sections help you address file organization efficiently. Using the feature ensures your designs are clear and easy to navigate, making for a seamless handover process.
How to organize your design with Sections?
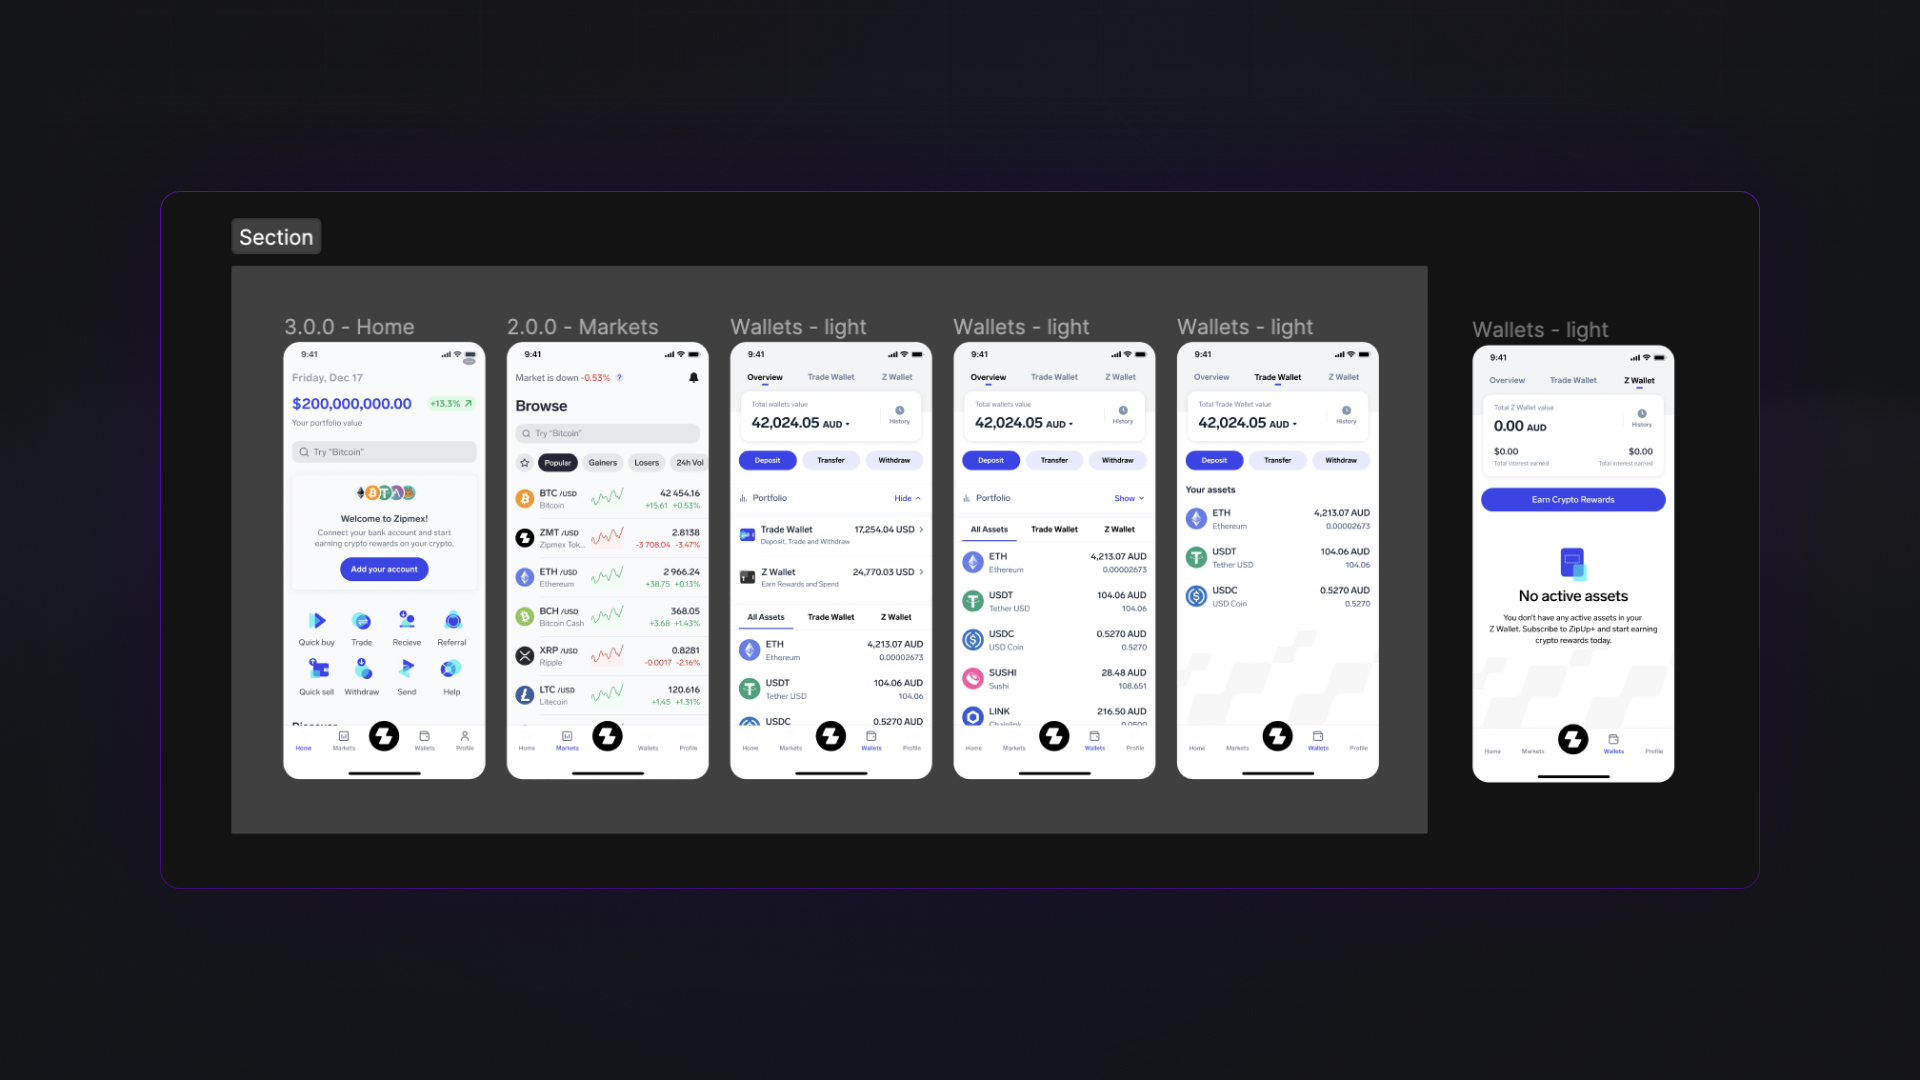
Organizing your design is the most basic function for Sections. When you use Sections for organization and structuring, you can add and delete elements and customize the Section.
To add and delete elements:

- Create a Section on your canvas by selecting and dragging your cursor to your desired area.
- Label your Section as desired.
- Add other elements to your Section by selecting and dragging the elements into the Section.
- Customize the color fill, border stroke, and opacity of the selected Section on the right panel in Figma to edit the Section.
- Double-click the section title on the canvas or Layers panel to rename the Section.
You can also share a link to the selected Section with your collaborators and mark them as ready for development for your developers.
To share a link to selected Sections:
- Select the Section you wish to share.
- Click on Share on the top right of the toolbar.
- Tick the Link to selected section box.
- Copy the link or send an invite to your collaborators.
- Click on the Section and mark the Section ready for development.
- Unmark the Section by performing the following:
- Click the Ready for dev label.
- Click the three-dot menu.
- Select Remove ready status.
Apart from seamless page organization, Sections serve another purpose by facilitating prototyping. When grouping and organizing prototypes, you can use Sections to connect different parts of your prototype, creating a cohesive flow throughout your design.
Building Prototypes with Figma Sections
Prototyping your designed interfaces is a straightforward process that connects one component to the next page after an action is performed. In Figma, you can choose which components and pages would be part of the flow and specific actions to trigger the transition.
Let's examine a use case
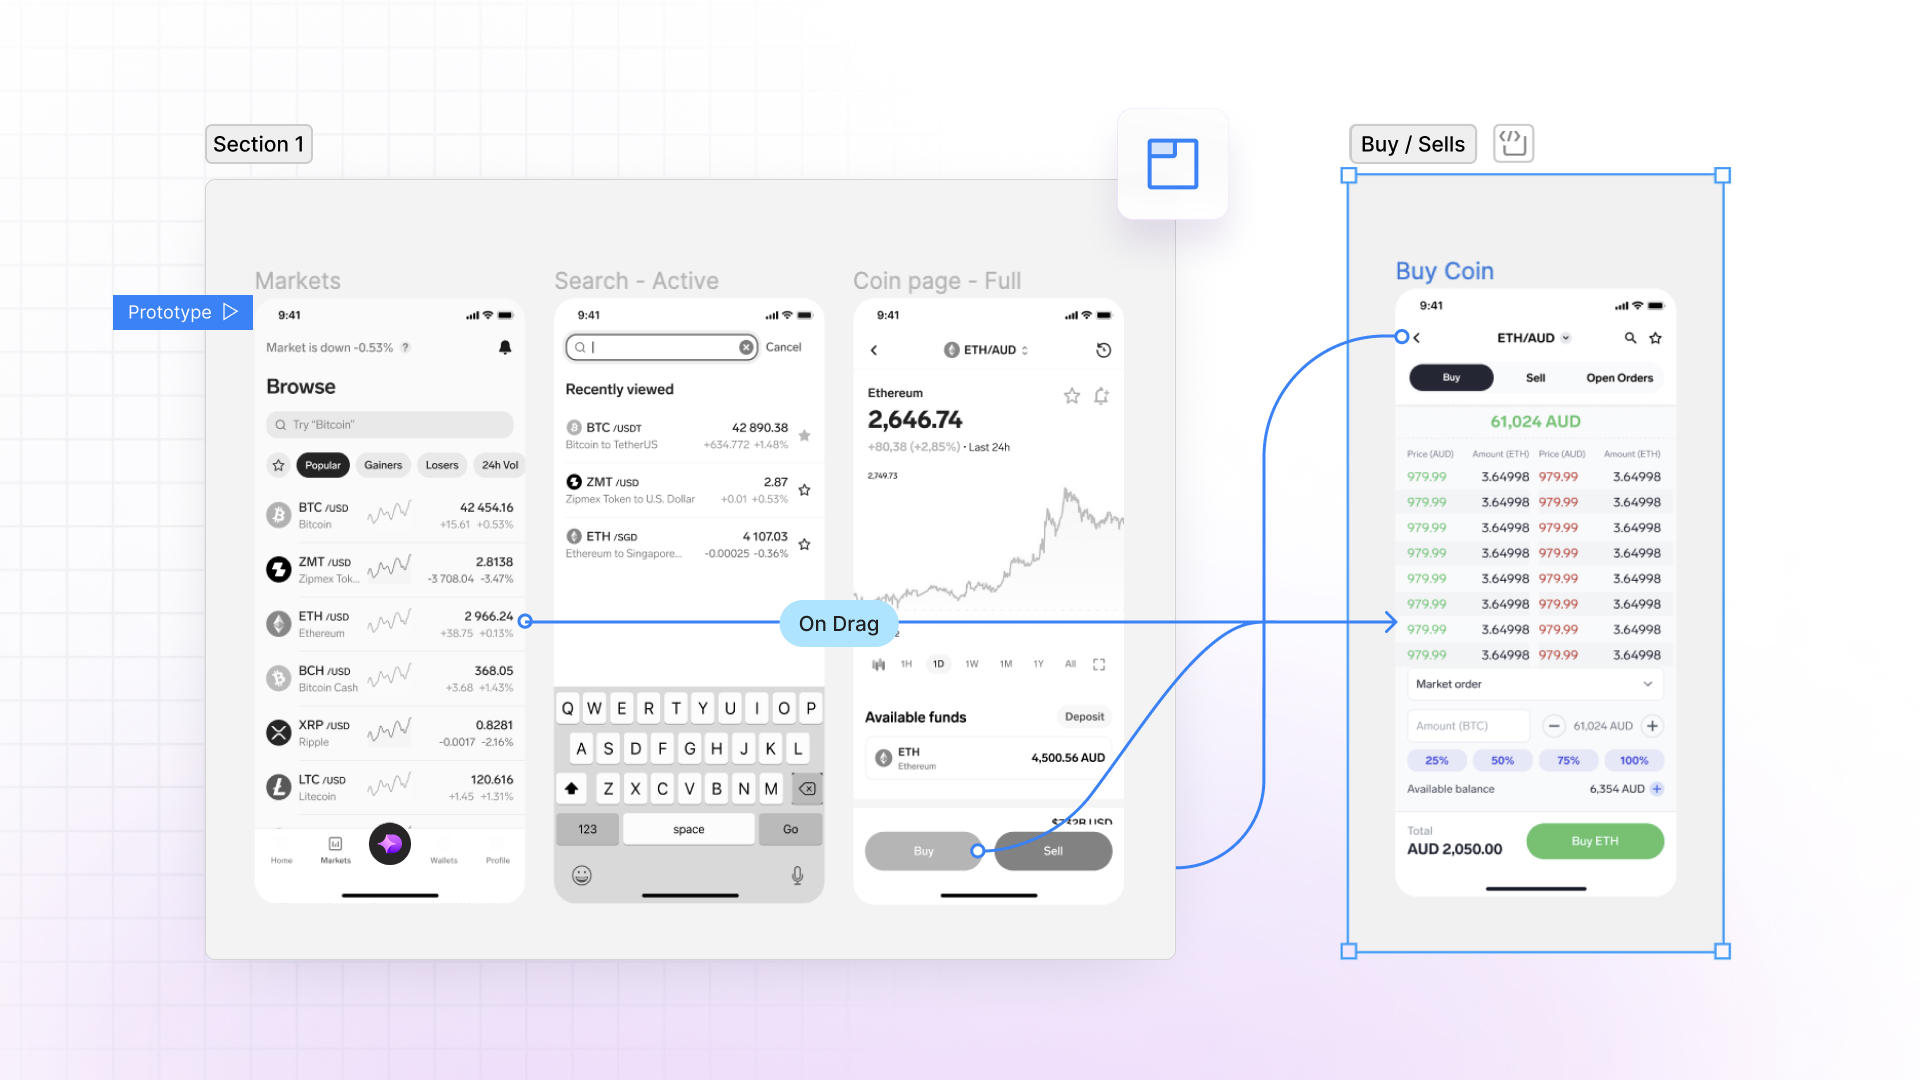
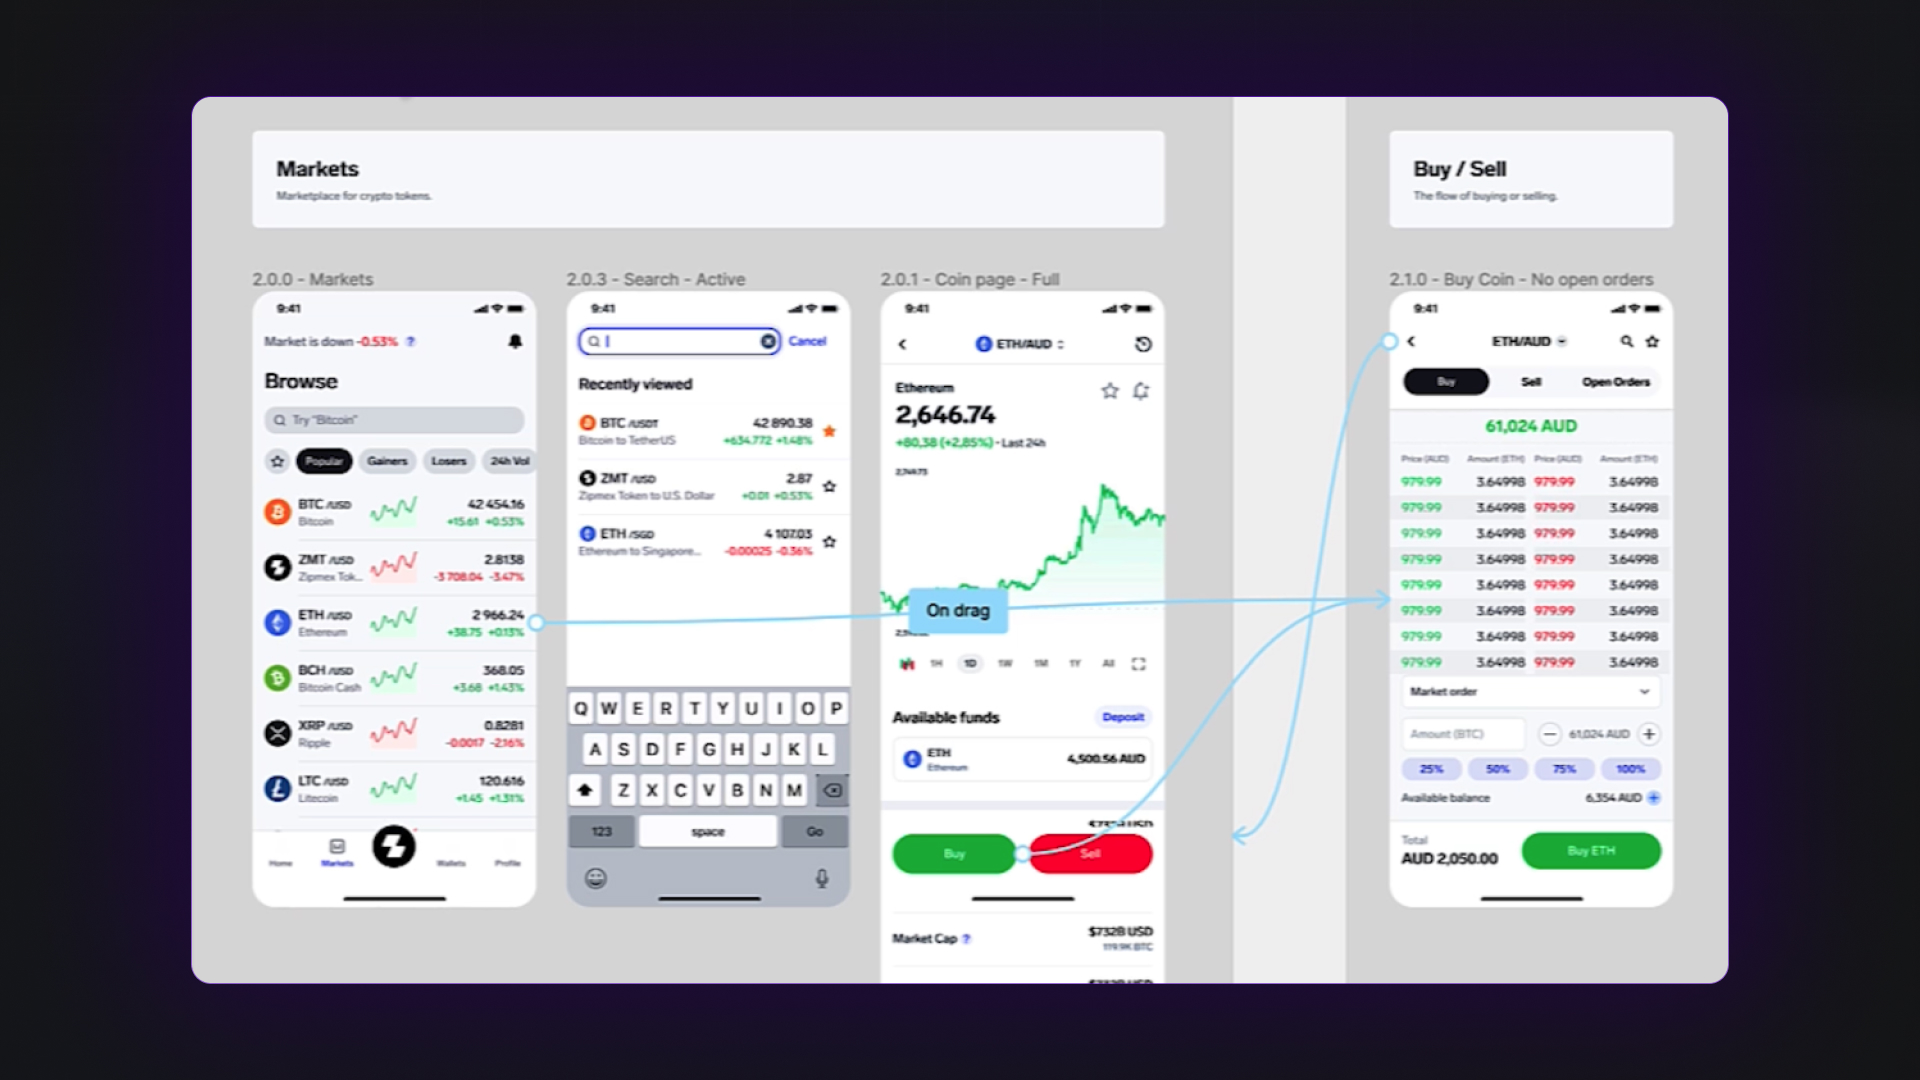
Suppose you're designing a cryptocurrency app with two main entry points: the main market page and a dedicated cryptocurrency coin screen. You aim to direct both pages' specific components to a buy-and-sell page. Utilizing the known prototyping method, you can successfully achieve this interaction.

However, your client or product manager then asks to link back the buy-and-sell page to both screens where it came from. This becomes a big hurdle when prototyping, as you can only create one link to one screen. Therefore, in the user flow, linking back a screen of your app would only return you to the one screen it's connected to.
How do we solve this?
With Figma prototypes, your design becomes more dynamic. Instead of linking back to just one page, Sections remembers the last page a user interacted with, returning them to the last opened page.
Sections combine pages of your design, allowing Figma to know which areas perform which flows in your prototype.
Using the same cryptocurrency app example, use Sections with prototype:
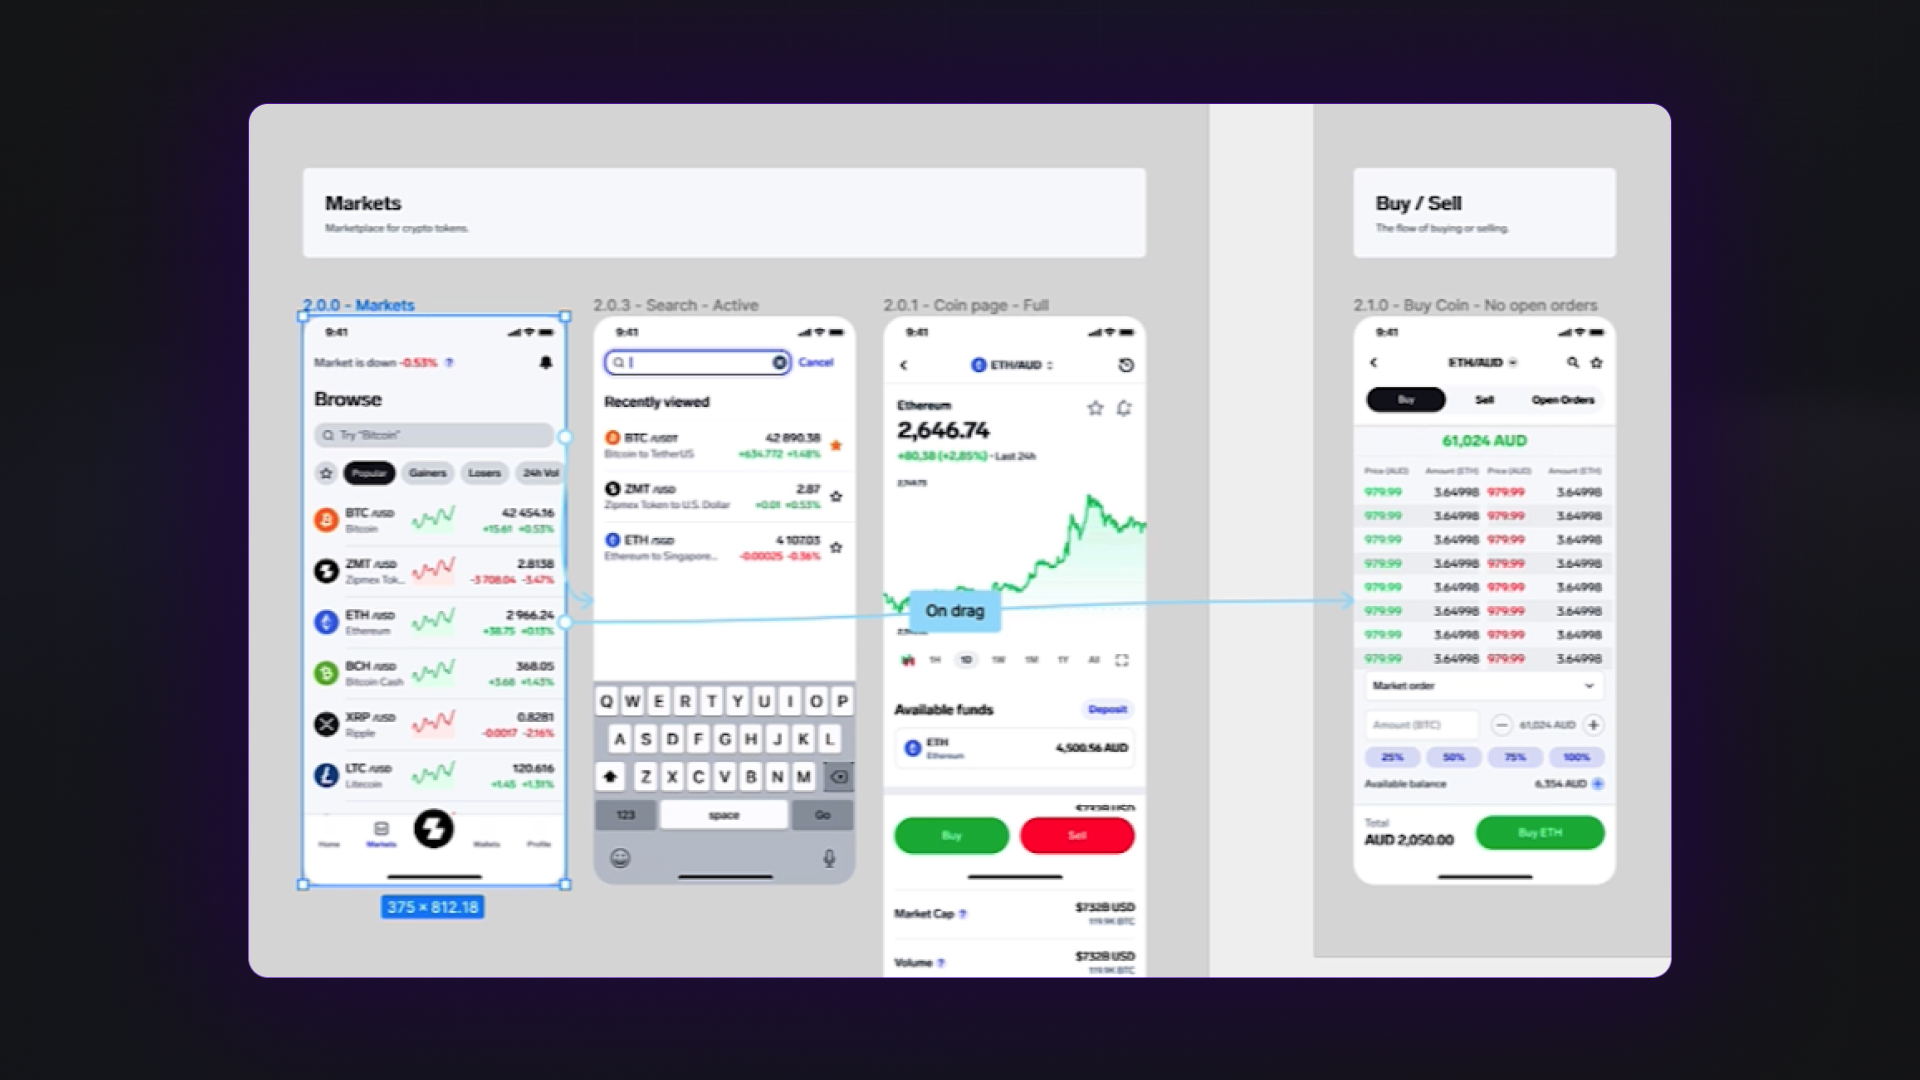
- Create separate Sections of the areas you wish to connect by performing the following:
- Use the toolbar to open Sections; or
- Press Shift + S to open Sections; or
- Click and drag the area you wish to section, right-click and press Wrap in Section.
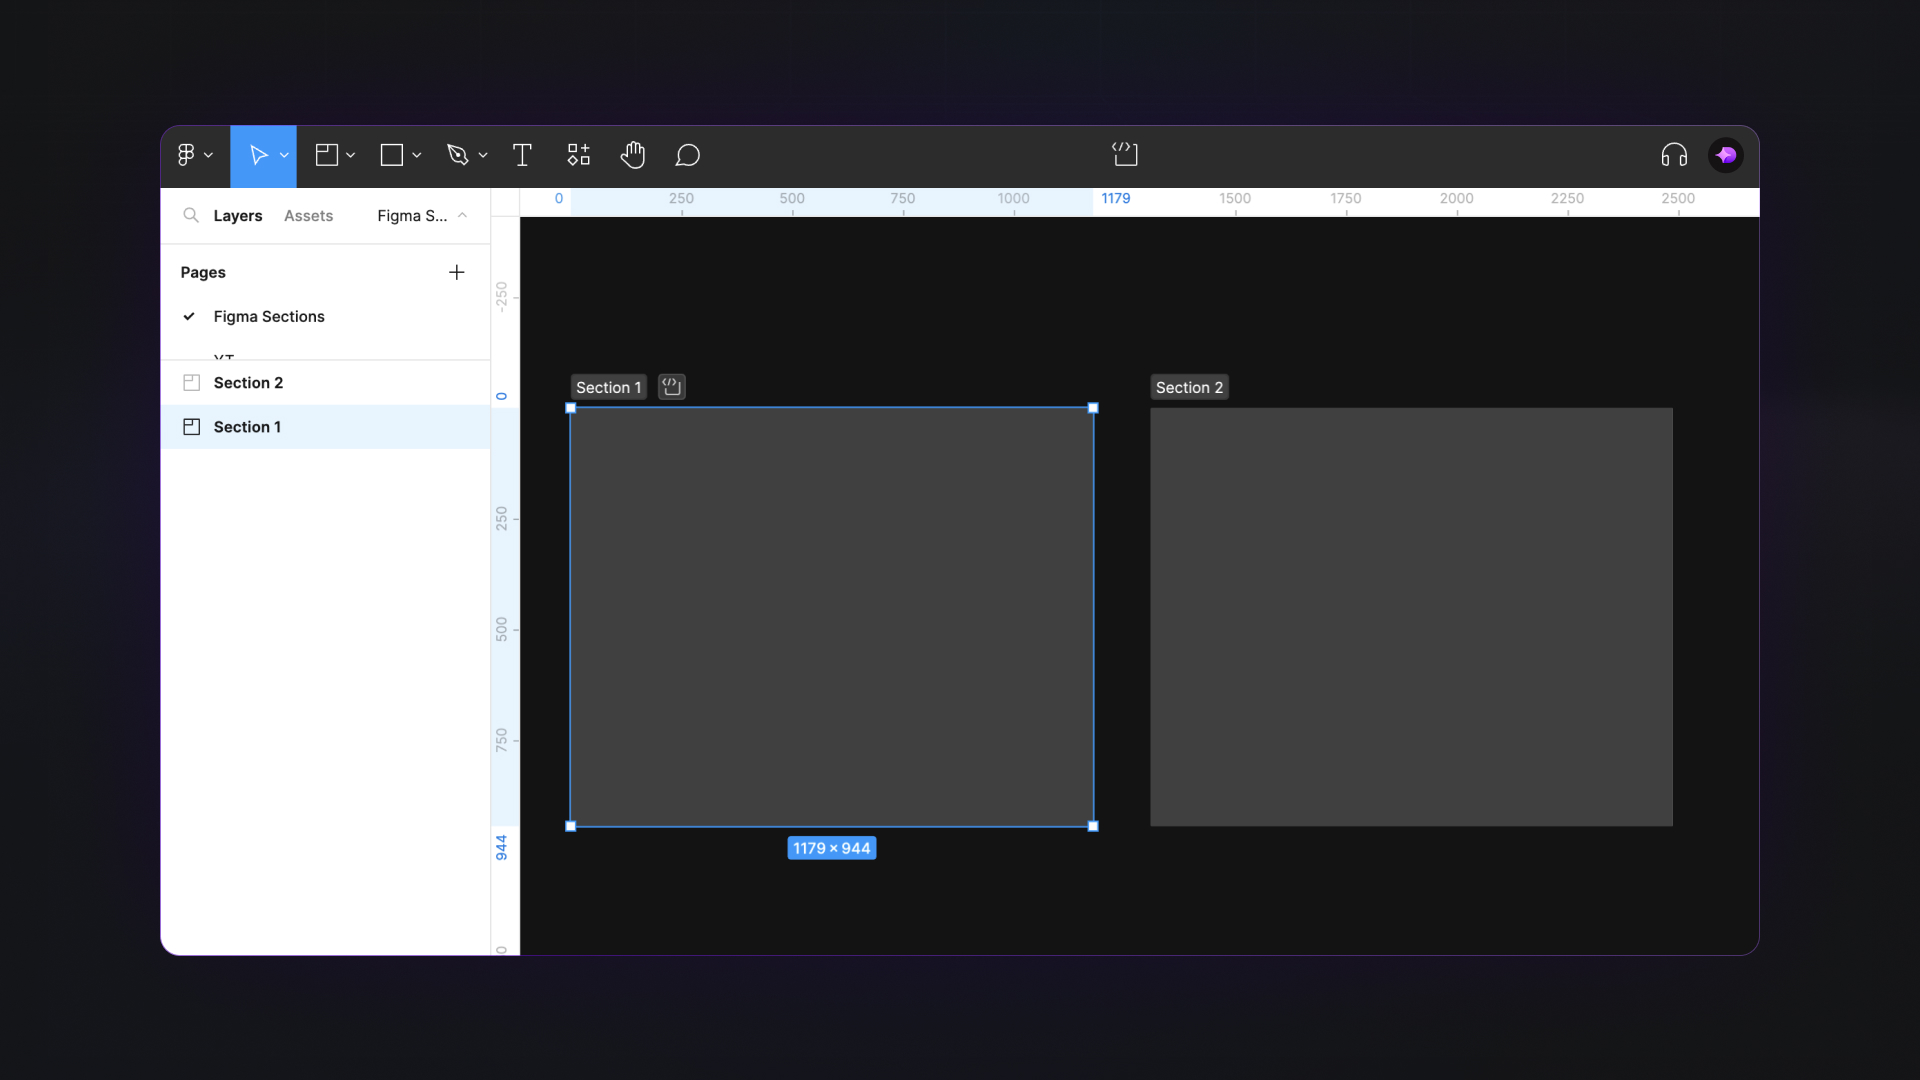
- Label your Sections as desired. (In this case, we used 'Market' and 'Buy / Sells')
- Click 'Prototype' on the right panel in Figma.
- Connect the subsequent flow by performing the following:
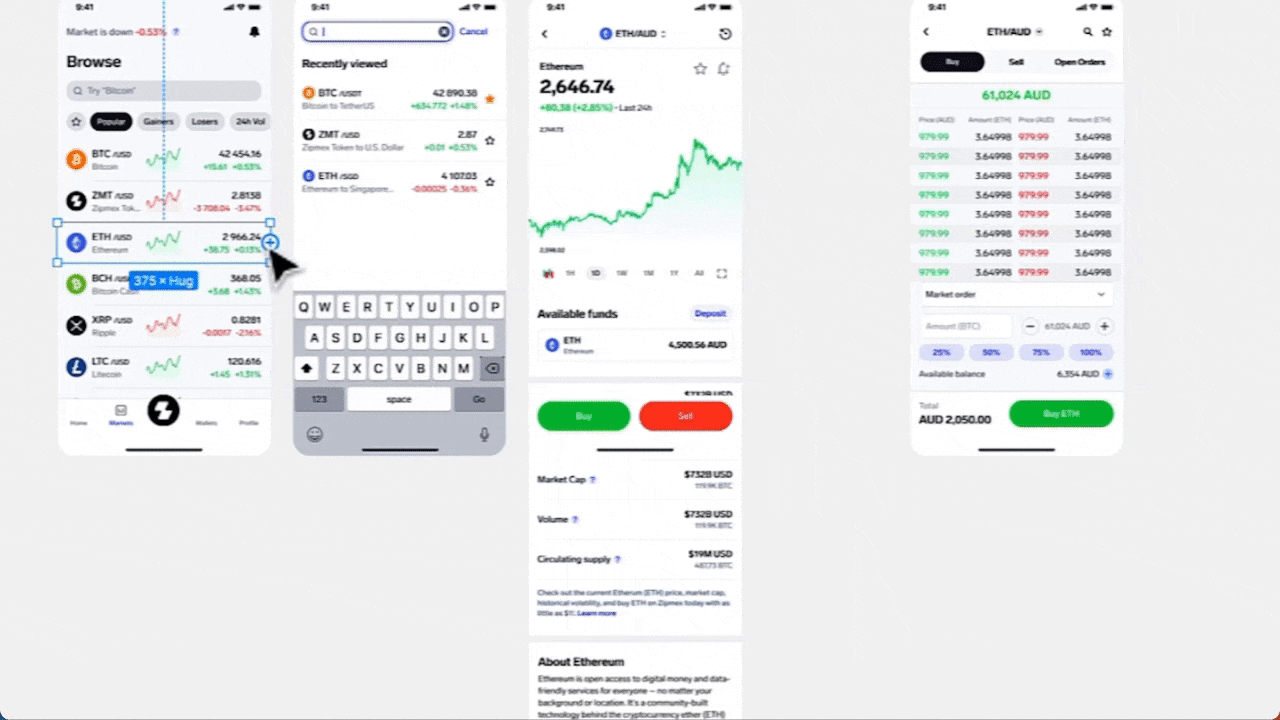
- Click the component on the 'Market' Section that you want to trigger the connection.
- Find a small circle icon on the component and drag it to the screen in the 'Buy / Sells' Section.
- Adjust the Interaction details (mouse action, delays, animation, etc.)Repeat for other screens as necessary.
- Link back the 'Buy / Sells' section to the 'Market' section by performing the following:
- Click the back component on the 'Buy / Sells' section.
- Find a small circle icon on the component and drag it to the 'Market' Section without linking it to any screen.
- Adjust the Interaction details (mouse action, delays, animation, etc.)
- Preview the prototype by clicking the 'Play' button on the upper-right toolbar in Figma.
When you've prototyped with Sections, you're no longer locked to specific pages. This allows you to design seamlessly while significantly reducing the time you take to create a prototype.
Master Prototyping in Figma
There are many other ways to prototype efficiently in Figma; utilizing Sections is just one of them. If you want to understand better how you can use Figma to create flawless and effective prototypes, check out our Ultimate Figma Masterclass course.
In this end-to-end Figma course, you'll be able to master Figma and UI design concepts such as Auto Layout, prototypes & animations, design systems, design frameworks, and more in just 10 hours.
The Ultimate Figma Masterclass Course emphasizes practical, hands-on learning taught by industry expert Michael Wong. This course also allows designers to enhance their skills and apply these learnings to real-life scenarios. Taught in a compelling step-by-step method, this course's engaging content will captivate every eager student's attention.
Don't take our word for it; our students have enough to say.


